How to Create Subscription in Stripe using Laravel Cashier
In today's digital landscape, subscription-based business models have become a cornerstone of revenue generation for countless online ventures. Whether you're running a SaaS platform, a content-based website, or an e-commerce store, implementing a robust and flexible subscription system is essential.
Fortunately, with the power of Laravel Cashier and Stripe, you can effortlessly create and manage subscription billing within your Laravel application.
In this comprehensive guide, we will walk you through the step-by-step process of setting up a subscription system that seamlessly integrates with Stripe using Laravel Cashier.
By the end of this tutorial, you'll be equipped to offer subscription plans to your users, handle billing cycles, and provide a smooth user experience that keeps your customers engaged and satisfied.
Laravel Cashier Stripe provides an expressive, fluent interface to Stripe's subscription billing services. It handles almost all of the boilerplate subscription billing code you are dreading writing.
In addition to basic subscription management, Cashier can handle coupons, swapping subscriptions, subscription "quantities", cancellation grace periods, and even generate invoice PDFs.
Throughout this journey, we will cover everything from initial project setup to configuring Stripe, creating subscription plans, and implementing the logic needed to manage user subscriptions.
Whether you're a seasoned Laravel developer or just getting started, this guide will provide you with the knowledge and tools to launch subscription-based services with confidence.
how to create a subscription in Stripe using Laravel Cashier, laravel 9 Cashier Stripe subscription, laravel 9/10 cashier tutorial, how to create a subscription in Stripe, subscription plan create laravel 9/10.
If you haven't already, create a new Laravel project or use an existing one.
composer create-project laravel/laravel stripe-subscription-example
In your .env file, and set up your Stripe API keys.
STRIPE_KEY=your_stripe_public_key
STRIPE_SECRET=your_stripe_secret_key
Laravel Cashier is a package that simplifies subscription billing. Install it using Composer.
composer require laravel/cashier
If you need to overwrite the migrations that ship with Cashier, you can publish them using the vendor:publish Artisan command.
php artisan vendor:publish --tag="cashier-migrations"
Cashier's service provider registers its own database migration directory, so remember to migrate your database after installing the package.
The Cashier migrations will add several columns to your users table. It will also create a new subscriptions table to hold all of your customer's subscriptions and a subscription_items table for subscriptions with multiple prices.
php artisan migrate
Install laravel auth scaffold using the following command.
composer require laravel/ui
Next, we need to generate an auth scaffold with bootstrap, so let's run the below command.
php artisan ui bootstrap --auth
Then, install npm packages using the below command.
npm install && npm run build
Then run migration using the following command.
php artisan migrate
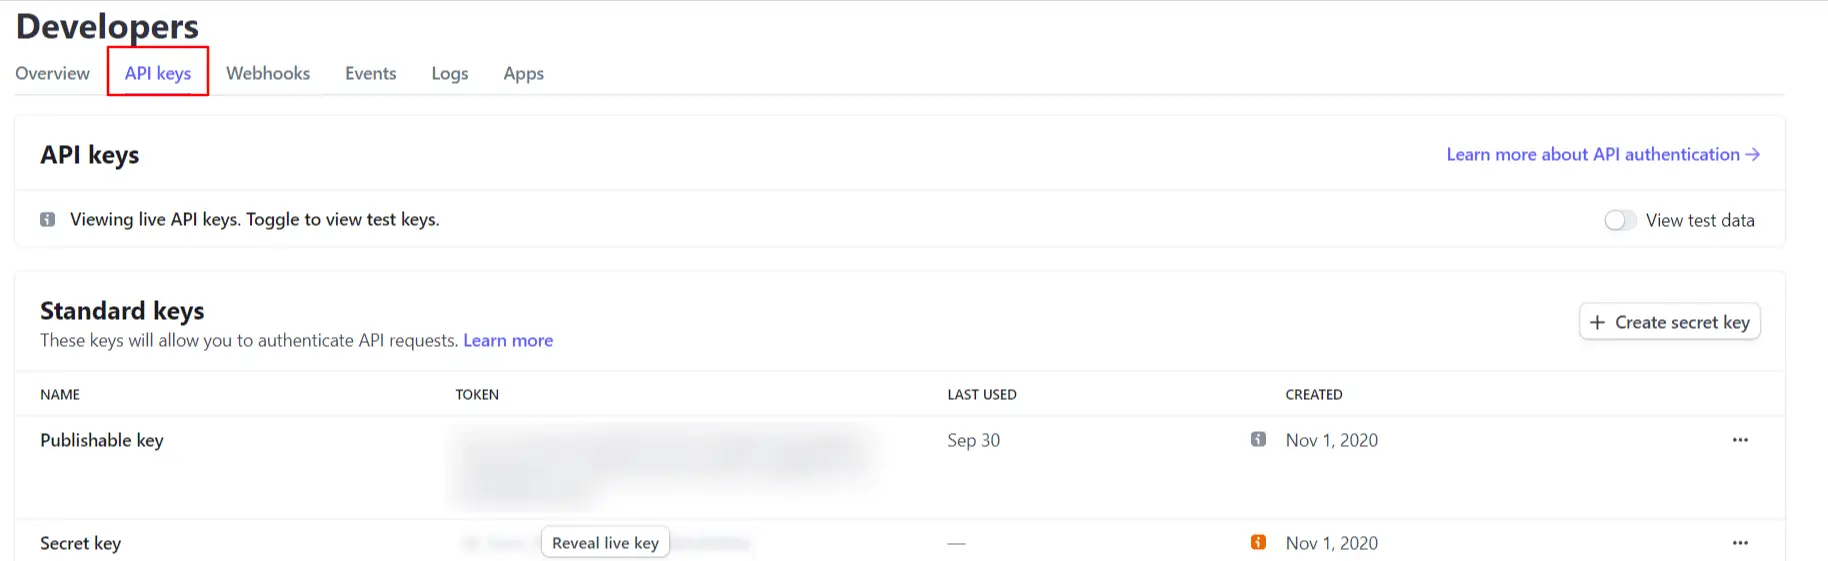
Now, create a stripe account and get the stripe API key and Secret Key. Open Stripe's official website.
After login, You need to go to the Developers tab and get API keys as like below.
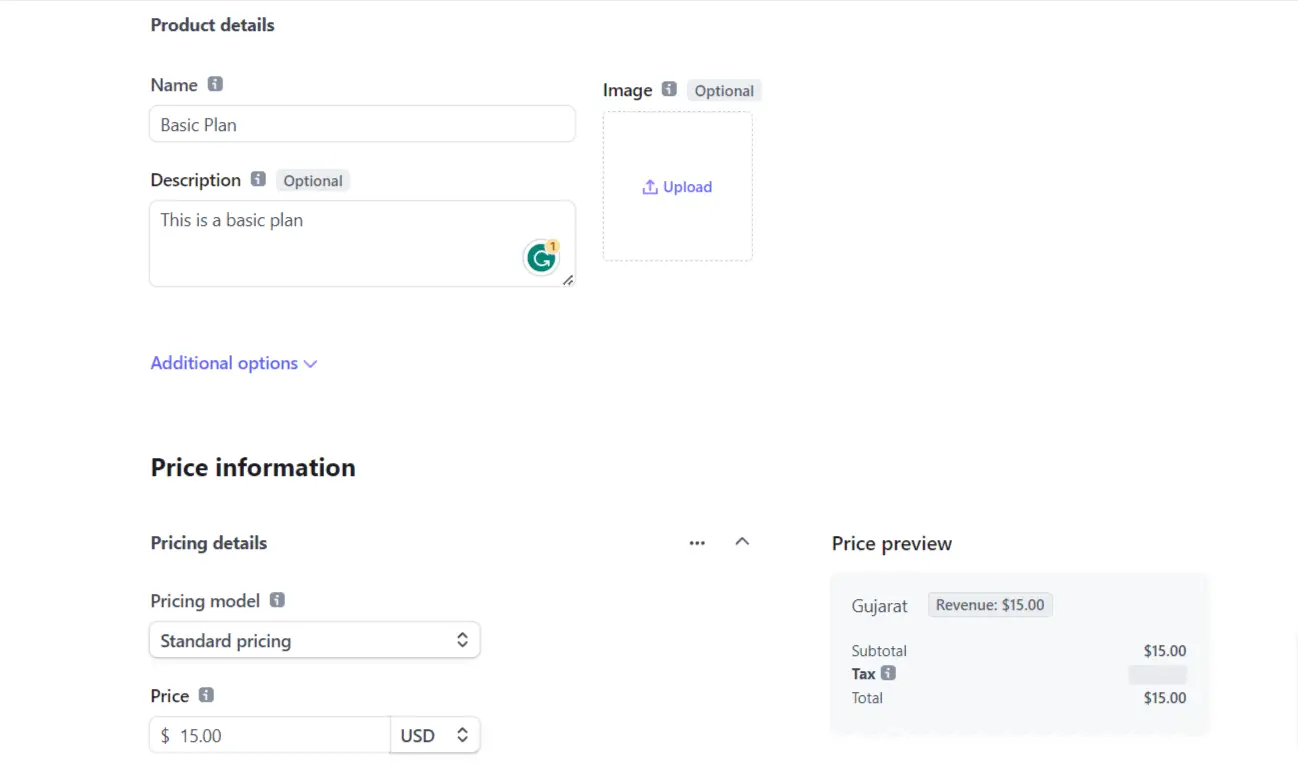
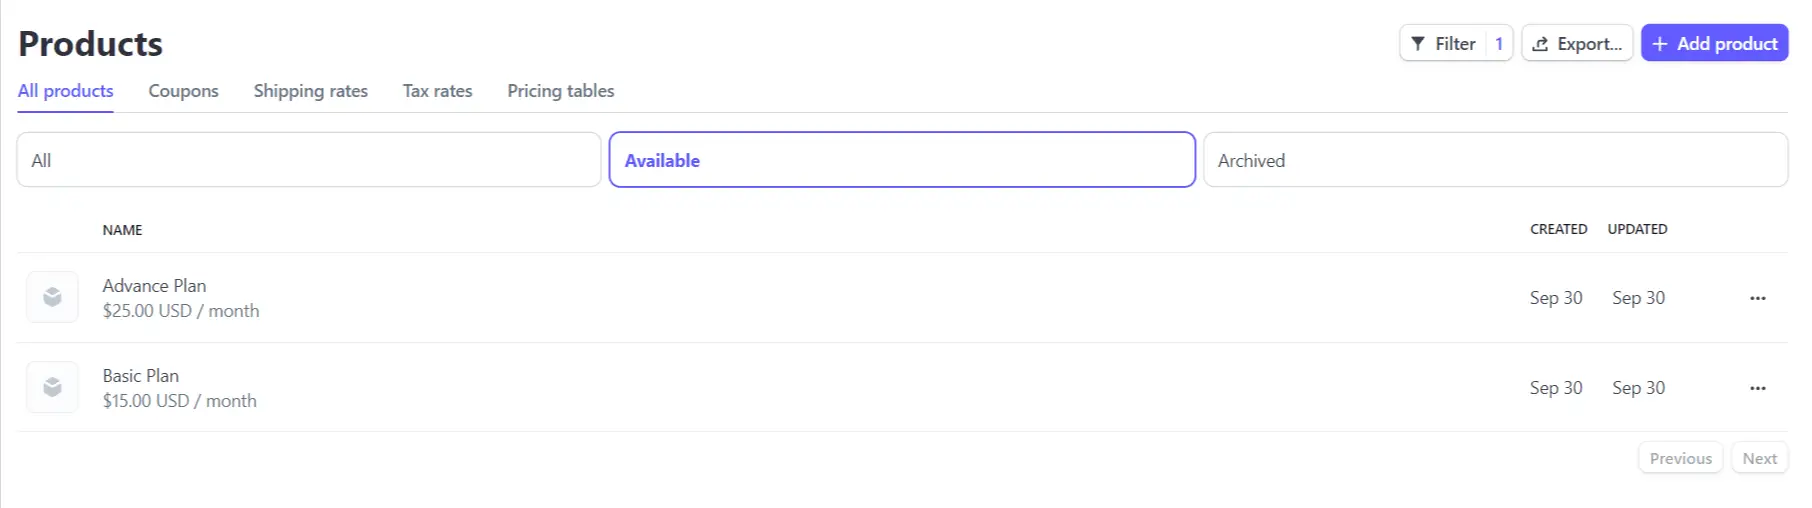
In the Stripe dashboard, create a product and add subscription plans to it. Take note of the plan IDs as you'll need them later.
Now, will use the cashier Laravel\Cashier\Billable class in the User model.
app/Models/User.php
<?php

namespace App\Models;

use Illuminate\Database\Eloquent\Factories\HasFactory;
use Illuminate\Foundation\Auth\User as Authenticatable;
use Illuminate\Notifications\Notifiable;
use Laravel\Sanctum\HasApiTokens;
use Laravel\Cashier\Billable;

class User extends Authenticatable
{

    use HasApiTokens, HasFactory, Notifiable, Billable;

    /**
     * The attributes that are mass assignable.
     *
     * @var array
     */

    protected $fillable = [
        'name',
        'email',
        'password',
    ];


    /**
     * The attributes that should be hidden for serialization.
     *
     * @var array
     */

    protected $hidden = [
        'password',
        'remember_token',
    ];


    /**
     * The attributes that should be cast.
     *
     * @var array
     */

    protected $casts = [
        'email_verified_at' => 'datetime',
    ];
}
Create migration and model using the following command for plans.
php artisan make:migration create_plans_table
Migration:
<?php

use Illuminate\Database\Migrations\Migration;
use Illuminate\Database\Schema\Blueprint;
use Illuminate\Support\Facades\Schema;

return new class extends Migration
{

    /**
     * Run the migrations.
     *
     * @return void
     */

    public function up()
    {
        Schema::create('plans', function (Blueprint $table) {
            $table->id();
            $table->string('name');
            $table->string('slug');
            $table->string('stripe_plan');
            $table->integer('price');
            $table->string('description');
            $table->timestamps();
        });
    }

    /**
     * Reverse the migrations.
     *
     * @return void
     */

    public function down()
    {
        Schema::dropIfExists('plans');
    }
};
Then run the migration using the following command.
php artisan migrate
Now, we will change to the Plan model.
app/Models/Plan.php
<?php

namespace App\Models;

use Illuminate\Database\Eloquent\Factories\HasFactory;
use Illuminate\Database\Eloquent\Model;

class Plan extends Model
{

    use HasFactory;
    /**
     * The attributes that are mass assignable.
     *
     * @var array
     */

    protected $fillable = [
        'name',
        'slug',
        'stripe_plan',
        'price',
        'description',
    ];

    /**
     * Write code on Method
     *
     * @return response()
     */

    public function getRouteKeyName()
    {
        return 'slug';
    }

}
Define routes in routes/web.php to handle the subscription-related actions.
<?php

use Illuminate\Support\Facades\Route;
use App\Http\Controllers\StripeSubscriptionController;

/*
|--------------------------------------------------------------------------
| Web Routes
|--------------------------------------------------------------------------
|
| Here is where you can register web routes for your application. These
| routes are loaded by the RouteServiceProvider within a group which
| contains the "web" middleware group. Now create something great!
|
*/

Route::get('/', function () {
    return view('welcome');
});

Auth::routes();

Route::get('/home', [App\Http\Controllers\HomeController::class, 'index'])->name('home');

Route::middleware("auth")->group(function () {
    Route::get('plans', [StripeSubscriptionController::class, 'index']);
    Route::get('plans/{plan}', [StripeSubscriptionController::class, 'show'])->name("plans.show");
    Route::post('subscription', [StripeSubscriptionController::class, 'subscription'])->name("subscription.create");
});
Create StripeSubscriptionController to handle subscription-related actions.
<?php

namespace App\Http\Controllers;

use Illuminate\Http\Request;
use App\Models\Plan;

class StripeSubscriptionController extends Controller
{
    public function index()
    {
        $plans = Plan::get();
        return view("plans", compact("plans"));
    }

    public function show(Plan $plan, Request $request)
    {
        $intent = auth()->user()->createSetupIntent();
        return view("subscription", compact("plan", "intent"));
    }

    public function subscription(Request $request)
    {
        $plan = Plan::find($request->plan);
        $subscription = $request->user()->newSubscription($request->plan, $plan->stripe_plan)->create($request->token);
        return view("subscription_success");
    }
}
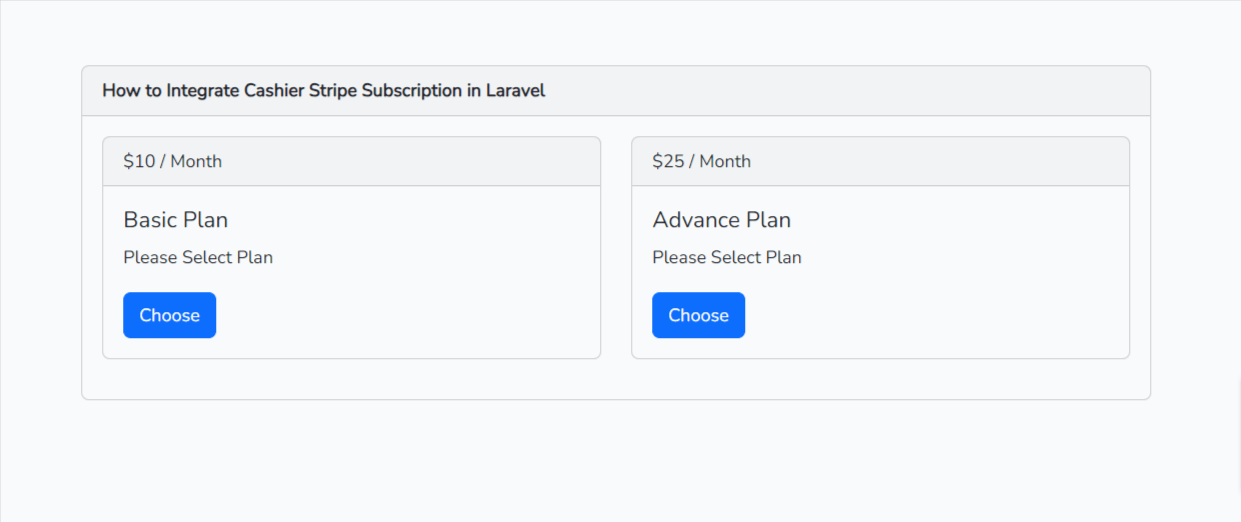
Create Blade views for subscription management, such as displaying the subscription form and showing subscription details.
resources\views\plans.blade.php
@extends('layouts.app')
@section('content')
<div class="container">
	<div class="row justify-content-center">
		<div class="col-md-8">
			<div class="card">
				<div class="card-header"><b>How to Integrate Cashier Stripe Subscription in Laravel - Techsolutionstuff</b></div>
				<div class="card-body">
					<div class="row">
						@foreach($plans as $plan)
						<div class="col-md-6">
							<div class="card mb-3">
								<div class="card-header">
									${{ $plan->price }} / Month
								</div>
								<div class="card-body">
									<h5 class="card-title">{{ $plan->name }}</h5>
									<p class="card-text">Please Select Plan</p>
									<a href="{{ route('plans.show', $plan->slug) }}" class="btn btn-primary pull-right">Choose</a>
								</div>
							</div>
						</div>
						@endforeach
					</div>
				</div>
			</div>
		</div>
	</div>
</div>
@endsection
resources\views\subscription.blade.php
@extends('layouts.app')
@section('content')
<div class="container">
	<div class="row justify-content-center">
		<div class="col-md-8">
			<div class="card">
				<div class="card-header">
					You will be charged ${{ number_format($plan->price, 2) }} for {{ $plan->name }}
				</div>
				<div class="card-body">
					<form id="payment-form" action="{{ route('subscription.create') }}" method="POST">
						@csrf
						<input type="hidden" name="plan" id="plan" value="{{ $plan->id }}">
						<div class="row">
							<div class="col-xl-4 col-lg-4">
								<div class="form-group">
									<label for="">Name</label>
									<input type="text" name="name" id="card-holder-name" class="form-control" value="" placeholder="Name on the card">
								</div>
							</div>
						</div>
						<div class="row mt-3">
							<div class="col-xl-4 col-lg-4">
								<div class="form-group">
									<label for="">Card details</label>
									<div id="card-element"></div>
								</div>
							</div>
							<div class="col-xl-12 col-lg-12">
								<hr>
								<button type="submit" class="btn btn-primary" id="card-button" data-secret="{{ $intent->client_secret }}">Purchase</button>
							</div>
						</div>
					</form>
				</div>
			</div>
		</div>
	</div>
</div>
<script src="https://js.stripe.com/v3/"></script>
<script>
	const stripe = Stripe('{{ env('STRIPE_KEY') }}')
	const elements = stripe.elements()
	const cardElement = elements.create('card')
	cardElement.mount('#card-element')

	const cardHolderName = document.getElementById('card-holder-name')
	const cardBtn = document.getElementById('card-button')
    const form = document.getElementById('payment-form')

	form.addEventListener('submit', async (e) => {
	    e.preventDefault()
	    cardBtn.disabled = true
	    const { setupIntent, error } = await stripe.confirmCardSetup(
	        cardBtn.dataset.secret, {
	            payment_method: {
	                card: cardElement,
	                billing_details: {
	                    name: cardHolderName.value
	                }
	            }
	        }
	    )

	    if(error) {
	        cardBtn.disable = false
	    } else {
	        let token = document.createElement('input')
	        token.setAttribute('type', 'hidden')
	        token.setAttribute('name', 'token')
	        token.setAttribute('value', setupIntent.payment_method)
	        form.appendChild(token)
	        form.submit();
	    }
	})

</script>
@endsection
resources\views\subscription_success.blade.php
@extends('layouts.app')
@section('content')
<div class="container">
	<div class="row justify-content-center">
		<div class="col-md-8">
			<div class="card">
				<div class="card-body">
					<div class="alert alert-success">
						Subscription purchase successfully!
					</div>
				</div>
			</div>
		</div>
	</div>
</div>
@endsection
Create a seeder for creating Basic and Advanced plans.
php artisan make:seeder SubscriptionPlanSeeder
database\seeders\SubscriptionPlanSeeder.php
<?php

namespace Database\Seeders;

use Illuminate\Database\Seeder;
use App\Models\Plan;

class SubscriptionPlanSeeder extends Seeder
{
    /**
     * Run the database seeds.
     *
     * @return void
     */
    public function run()
    {
        $plans = [
            [
                'name' => 'Basic Plan',
                'slug' => 'basic-plan',
                'stripe_plan' => 'price_xxxx', // Plan ID
                'price' => 15,
                'description' => 'Basic Plan'
            ],
            [
                'name' => 'Advance Plan',
                'slug' => 'advance-plan',
                'stripe_plan' => 'price_xxxx', // Plan ID
                'price' => 25,
                'description' => 'Advance Plan'
            ]
        ];

        foreach ($plans as $plan) {
            Plan::create($plan);
        }
    }
}
Now, run the seeder using the following command.
php artisan db:seed --class=SubscriptionPlanSeeder
Output:
Card Details:
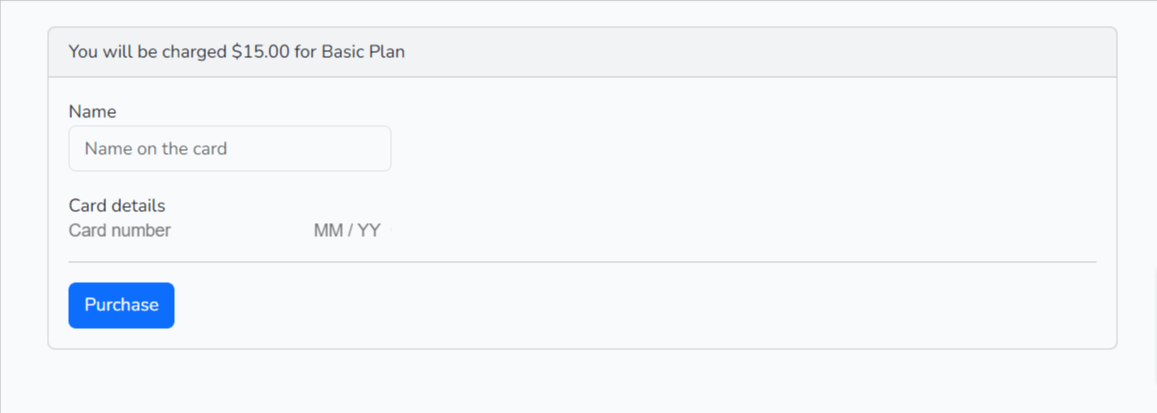
Card Details:
Name: Test
Number: 4242 4242 4242 4242
CSV: 123
Expiration Month: 12
Expiration Year: 2024
Congratulations! You've now created a subscription system using Laravel Cashier and Stripe. Your users can subscribe to plans, be billed accordingly, and manage their subscriptions within your application.
You might also like:
- Read Also: Host is not allowed to connect to this MariaDB server XAMPP
- Read Also: How To Integrate Paypal Payment Gateway In Laravel 8
- Read Also: Laravel 9 Razorpay Payment Gateway Integration
- Read Also: Laravel 9 Stripe Payment Gateway Integration


